May 20, 2014

Daisies and Summer..!!

Now its time for summer, I see daisies all around. Then why not to have fun making couple of them with felt cloth..!!
Materials Required:
Felt cloth- white, yellow and green
Buttons
Florist tape
Florist wire
Needle and thread

Steps
1. Flower Petals & center part
Cut out felt cloth in circle shape. The size can be of your choice. The smaller circles for center part need to be just 5mm diameter more than that of button.


2. Creating Petals
Trace circular shapes on felt as given below. Start cutting across the lines.

Start cutting the edges first in one direction and then in opposite direction
3. Creating the middle part
Using button holes and the florist wire, create stem by passing the wires through the holes.
Twist the wires and make them tight
4. Using the earlier cut outs for center part, sew around the circle using running stitch.
5. Keep the created stem in center and pull the thread to secure it in middle. Stitch it as required and make sure its tight enough

6. Sepal is optional based on how pretty you want to make the flower look. Make a small hole on the center of petal to pass it through the stem.
Use the florist tape to cover the green wire.


Enjoy crafting.!!

May 13, 2014

Cherry Blossom..It's all about spring.!

Had been a year I created anything. So thought spring is the best time to be back with full of energy and liveliness.!!

Spring means its all about cherry blossom blooming and cherry blossom festivals at Washington D.C. and places like Macon, Georgia.
Lets make those cherry blossom flowers with felt material and bloom the living room with its beauty.

Materials required:
1. Felt cloth
2. wire- 20 gauge
3. wax coated strings
4. needle/ thread
5. beads (optional). Only if you do not find wax coated strings, then use beads to create the stigma

Step1. Cut the felt cloth in below shape. You can cut out the pattern in cardboard first to ease the job and have all with same size and shape.
Step2: Using needle and thread, start running stitch along the edge.

Step3: Start pulling the thread tight to create a flower shape.

Step4: Stitch the first and last petal together to make sure the pulled thread is tight and secured.
Step5: Start making 3 loops of wax coated string that will be used for making stigma. 
Step6: Use the metal wire, insert between the gaps and start twisting together.

Step7: Cut the top ends of these wires.
Step8: Add the created flower petals and adjust to make sure they are aligned closer and can be stitched tight.
Step9: Using needle and thread, stitch from bottom to top between the metal wires to secure the wire and felt cloth together.
Step10: Using a small dried branch, start fixing the flower by twisting the metal wires around the brand and you are all set.!!

Enjoy crafting..!! Hope you can share your experience making these flowers.!!! :)


December 29, 2012

Fabric Felt Roses

This time let's make easy fabric felt flowers to pin up on coats, jackets, knit tops, stoles and many more.!!
Let's learn how we can do this in no time..!!


Materials Required:
Fabric Felt- from 1 sheet you can make 2- 4 flowers, depending whether you want to make single roll flower or double. I am going to make double rolled with 2 different shades of fabrics.
Hot Glue gun
Scissors
Safety Pins

Making Steps:

This time all the steps are covered in the video link (click here)

Few Tips:
1. You can make flowers with single cut out sheet (which is quarter sheet of the full fabric sheet)
2. You can use same colors to make the flower bigger
3. Try to little glitter glue and let them dry to add more beauty to flowers, especially if its for kids.
4. I have demonstrated to you it with safety pins. You can glue it on hair pins, head bands too.!!!


Hope you enjoy this crafting..!!
Happy flower making..!! :)

Inspired from: Other blogs and youtube videos


December 16, 2012

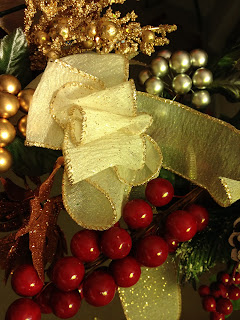
Ribbon Bow on my Christmas Wreath.!

Its been a long gap and I am back with a small and easy bow making for Christmas holidays..!
I made a wreath which was easy using ready made decorations and then with a big bow to add to the beauty. Let's see how you can also make it for this Christmas..!


Materials Required:
Styrofoam as wreath base
Decorative Ornaments
Pins
Ribbons
I picked everything from Michaels and with a discount..!

Approximate cost : $20

How to Make:
1. Select the ribbon you want to cover the Styrofoam with and start wrapping around, securing with pins.


Step 2: Gather all the decorative things and pin it on the styrofoam. Do it for 3/4th part. We can use the rest part for a pretty bow

Step 3: Now let's make the bow. You can see an off-white bow in this wreath. Let me show how to make that.
Actually you can make bow in many different ways. I will show you 2 of the methods to make it.
This is the method I used to make both off-white and my 2 shaded bow on the wreathe.

http://www.youtube.com/watch?v=t5sOWZWgxIE


I have made another video to show how to make 2 shaded bow using different method

Hope you would like to give it a try and make one for this Christmas..!!
Happy crafting..!!

November 1, 2012

Simple Wreath Creation

This is one of the easiest way I figured out when there were different wired ribbons laying in my box. I made an easy and simple wreath, yet which is pretty to be on your door..!!


Materials Required:
Wired ribbons - 2.5 inch width (without wire are fine but wired is easy to shape it)
florist metal wire or any metal wire which is easy to twist around
Scissors
Cones (optional)

Time Consumed: 1 hr
Complexity: Easy

How to do:

1. Cut metal wires into 2 with length almost equal to your wreath circumference. So the best way to figure it out is make a circle of the wire, and double the length of it. That becomes total length of one  wire. Cut out one more of same length
2. Leave almost 4 inch length and twist them both together
3. Next steps are created in video format, however to summarize it- Loop the ribbon and insert between two wires, then twist the wires twice. Again loop the ribbon, twist wires together twice and so on. Click on the link Wreath creation beginning steps
4. I added pine cones in between and tweaked wire.

5. Keep changing ribbon colors.
6. Once completed, twist the wires in such a way that the ribbons the cover up the in between visible wires.
 
7. Join both ends by twisting them together

8. Add another ribbon to hang it on your door.

And you are all set..!! :)
 

September 5, 2012

Coiled Paper Bowl..!!

I was checking into few Philippines coconut leaf basket, hat weaving, which redirected me to weaving traditions of different places.
I am going to show how to make bowls or baskets by using old newspapers, or magazines and coiling.
Coiling is one technique of basketry used by native Americans across North America.
Now let's get set and search old magazines..!!


Required Materials:
Old newspapers, magazines or books
Glue
Scissors
Mod Podge (optional)

Time consumed: approx 5 hrs
Complexity: Easy

How to do:
I would like to mention that the steps are easy but is time consuming, have patience..!! lot of patience..!! :)

Making paper strips
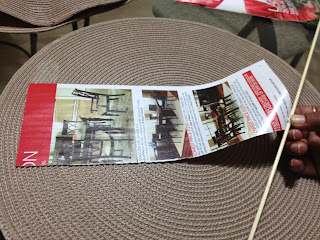
1. I used magazine sheets. You can use newspapers and cut out into smaller pieces.

2. Use any thin stick for initially helping to roll the paper sheets as shown


3. Gradually remove off the stick

4. Glue the end and flatten the strip. Make sure that you leave the ends a little cylindrical itself. This helps to join the next strip easily.

Making the base
3. Start coiling around to make the base. Keep gluing after every round.


4. To attach every flat strip to the other- apply little glue and insert the other end. Press firmly and continue coiling.

5. Make the base using around 15 strips. Keep aside and allow the glue to dry. Spray Mod podge which can strengthen the base.
6. Now again keep rotating strips around the base, but make sure that you don't glue it to each ring. I made 20 rounds and once done, glue the end.

7. Gradually pull each round upward to give it a shape.


8. Apply glue with a brush slightly or spray mod podge outside and allow to dry for 30 min.
9. Apply glue at sides of base and gradually stick it inside the other coiled top section. Be careful as too much pressure can disturb the coils and make them come out of rounds.

10. Allow the whole bowl to dry of completely..

Now its ready to be a centerpiece. You can make as large as you want, as it is pretty firm and place any decorative piece inside. You should remember that it cannot hold water.

I am interested to try few more shapes..!!
Let me know about your try and what design comes into your mind.!!  Your comments are valuable.!! :)
Happy coiling..!!

Inspired from: Mexican youtube videos (I don't have a specific link to paste here)